Contents
Key Takeaways
- Building your own shed is rewarding and flexible. Whether it's for tools, hobbies, or a home office, a DIY shed gives you full control over design and function.
- Start with a solid foundation. From simple concrete blocks to full slab foundations, your base is what keeps your shed stable and long-lasting.
- Follow a clear step-by-step process. Key stages include laying the foundation, building the floor, framing the walls, and installing the roof.
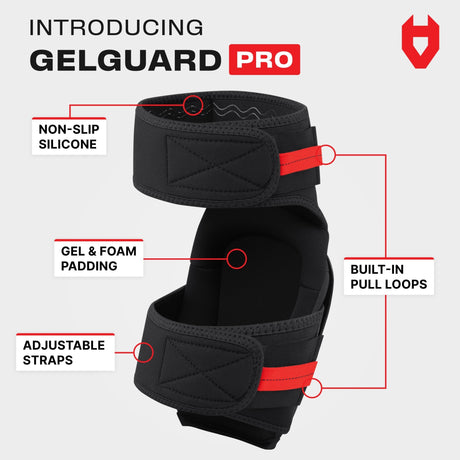
- PPE matters. Use gear like safety glasses, work gloves, and knee pads to stay safe and comfortable throughout your build.
- Use a shed planner. It helps you test layouts, calculate materials, and stay on budget before you start building.
- Maintenance keeps it going. Check for leaks, repaint or stain the shed every few years, and ensure the foundation stays level.
Building a shed is highly rewarding. Your shed could be additional storage space, a workspace, and even your little get-away from the world.
Whether you need additional room for your tools, garden supplies, or simply a nook for hobbies, building your shed yourself provides the flexibility in creating the ideal space.
In this post, we will walk you through the whole process, from planning to construction, so you may be able to build a shed that would work for you and last for many years.
Step 1: Plan Your Shed
Before you make a list of all the materials you will be needing, there needs to be a plan inside your head. The following are some questions that you may want to consider:
How big of a shed do I need? That would depend on how much room you have and what you are going to store in the shed.
What design should I go with? Everything from simple storage sheds to the more complex project-a shed with a porch or even a second floor.
Sizes to consider include the following:
4x8 Firewood Shed Plans: Perfect for keeping your firewood dry and ready for use all year round. Ideal for backyards or small spaces!

10x10 Shed Plans: Perfect for garden tools, small lawn equipment, or a potting station.

10x12 Shed Floor Plans: Awesome for those looking for a little more room for lawn equipment or hobby tools. Or even a home office.

12x24 Shed Plans: Great for the large equipment or multipurpose use like a workshop or home office.

Lean-to Garden Shed Plans: These are perfect for a much smaller space, and typically built against an existing structure.

Lean-to Storage Shed plans: Practical and space-saving design, ideal for fitting into narrow spaces alongside existing structures.

Once you have decided on the size and design, it is time to prepare all the materials and tools that you will need. You can also get a work apron during the preparation stage, where your tools will be organized and accessible to you during work.
Step 2: Foundation Selection
The foundation provides the necessary stability and leveling for your shed's needs for durability over the years. For shed foundations, you may use one of these options:
- Block Shed Base: This is the most straightforward, easiest, and cheapest method of starting off a shed. You will simply set your shed on top of blocks that bear the weight of the shed, which are evenly spaced and leveled out.
- Shed Slab Foundation: In case you want it more permanent, then a slab of concrete provides stability and may last longer. Ideal for big or heavy sheds.
- Setting Shed Footings: One can set footings to give your shed extra stability. The depth for the setting of shed footings should at least be 12-16 inches, while for frost areas, they have to be 24-36 inches deep to prevent shifting during freezing and thawing cycles.
Step 3: Laying the Foundation
You shall conduct the following before laying the foundation:
- Clean out the Lot: Remove all grass, rocks, and other debris from the area in which you'll be constructing.
- Level out the Ground: If it's a little uneven, you can pry up with a shovel and rake over it; or if it is considerably uneven, fill it in with gravel or sand to a level surface.
- Mark out the Spot: Stake out and string off the area just to double-check your shed's dimensions.
Safety glasses protect your eyes from flying debris while preparing the foundation, while knee pads keep you comfortable during long hours of kneeling on the ground.
Step 4: Building the Floor
The shed floor is built directly onto your foundation. Here's how to construct a strong floor:
- Lay Pressure-Treated Joists: Lay the pressure-treated lumber for the joists, ensuring that they are level and evenly-spaced, which may be a spacing between 16-24 inches.
- Install Plywood Flooring: Use exterior-grade plywood for the floor decking. Screw or nail to the joists.
Step 5: Framing the Walls
Now you shall frame the walls of your shed:
- Wall Panels: The framing of each wall is made on the ground, using 2x4s for the studs placed at equal distances apart, usually 16 inches on center.
- Raise the Walls: With the framing for each wall built, they would be hoisted into position and attached to the floor.
- Add Support: The walls are squared and kept in place with diagonal bracing.
Cut-resistant gloves can be worn for safer handling of sharp tools and lumber during this process to protect the hands from cuts and splinters.
Step 6: Roof Installation
The roof protects your shed against many environmental effects. You may employ several roofing styles that best suit your preference and your region's climatic condition:
- Install rafters or trusses: Either simple ones, depending on the size of your shed, or pre-fabricated. Attach these to the top of the walls.
- Lay down Roof Sheathing: Once rafters are in place, you'll add plywood sheathing over them to actually form the base of the roof.
- Install Roofing Material: Based on your shed's design and durability needs, you can use a variety of roofing materials, including shingles and metal panels.
Step 7: Adding Windows, Doors, and Finishing Touches
Your shed is now on course to take shape. Time to add the windows and doors!
- Windows: Cut out openings in the walls and frame them out if your shed plan has any windows. Install windows securely and weather-tight.
- Doors: Install a sturdy door to suit the purpose of your shed. Double doors for big sheds should be considered to ensure the ability to access bigger-sized equipment.
- Finishing Touches: Add the trim around windows and doors, paint or stain the exterior, and install gutters to direct rainwater away from the shed if needed.
Step 8: Make Your Shed Personal
After having an initial skeleton of the shed, you are at the liberty to personalize your shed according to your needs. Here are a few ideas to get you started:
Shed with Porch: Attaching a porch would make your shed look cute and homely and also provide some more storage or sitting space.

Two-Story Shed Designs: If you need more room, consider building a second story. This is excellent for storing in the loft or even a work area upstairs.

Interior Customizations: Shelving, pegboards, and workbenches can make the inside of your shed more functional and organized.
Step 9: How to Use a Shed Planner
You can go into your design, test various layouts, and even work out how much materials might be needed in advance of actually starting the project. With this, your project will stay on course and within budget as well.
Step 10: Maintenance and Longevity
Following proper after-sales maintenance will ensure that your shed would stand firm in a field for the next many years.
- Check for Leaks: Evidence of water damage or leaks in your roof and walls should be checked yearly.
- Repaint or Stain: Repaint or stain your shed every couple of years to protect it from the elements.
- Foundation Check: Ensure that the foundation remains level and stable, especially after heavy rainfall or freezing temperatures.
Conclusion
Building a shed is a rewarding project that adds both function and character to your property. Whether you're using concrete blocks, pouring a slab, or planning a two-story design, the key is to start with a solid foundation and a plan that suits your needs.
Don’t forget — using the right PPE will help keep the job safe and comfortable from start to finish.
Happy building!
FAQ
Can you move a shed?
Moving a shed requires a little planning and preparation. First, clear out the shed to lighten its weight. To move it, you'll be using jacks to raise it high enough off the ground. Then you can slide pipes, logs, or skids underneath the structure so that you can roll the structure, or you can use a trailer or flatbed truck to transport it. Ensure that the shed is tied down properly through the move to avoid shifting and damages that may result. Larger sheds, on the other hand, you may desire to bring in professional movers.
How to build a shed ramp?
Building a ramp for your shed is quite practical in making access easy. First, measure the entrance to your shed to determine the width and length of the ramp that you will be building. Cut angled stringers to support the ramp, using treated 2x6 boards. Nail the stringers to the shed base, equal distance apart. Treated plywood or boards should be placed across the stringers after the stringers have been attached, and those boards nailed into place. The recommended slope should be gradual, say, a rise of 1 inch for every 12 inches of ramp length for safe passage.
Do I need a permit to build a shed?
Whether you need a permit is generally determined by local building regulations and the size of the shed. It's always best to check with your local building authority, as small sheds-only about 120 square feet or less-are usually exempt from needing a permit, while larger sheds usually require one. You will also want to consider zoning laws, such as setback requirements from property lines or utility easements, to ensure your shed complies with local rules.
How to get rid of bees in a shed?
If you badly need to clear your shed of bees, put on your protective gear to protect against bee stings. A bee spray or an insecticide meant for bees can be sprayed because the bees are much less active during these hours of the evening and early morning. Once all the bees have gone, fill in the cracks and holes on your shed so that they don't come back. If you're not comfortable dealing with the bees yourself, then it's time to call an expert exterminator or beekeeper who will safely and eco-friendly get rid of them.
Does painting a metal shed white cool it down?
Well, painting a metal shed white will, of course, help cool it down. Since the white paint reflects sunlight, the amount of heat that is absorbed by the shed's metal surface is lessened. This can lower the internal temperature when it gets hot outside and makes the shed even more comfortable. You can take the cooling effect one notch higher with a reflective roof coating.

